Testing with Selenium and Junit (Restful Booker)
View on Github
Visit Restful Booker Demo
OVERVIEW
I have been practicing my fluency with Selenium using the many practice websites available on Automation Panda. Since Selenium is popular open source library for automating browser testing, figured it would be good to walk through some of my observations and findings while writing unit tests for the front end of Restful Booker, a website intended to simulate booking accommodation at a bed and breakfast.
INTRO TO RESTFUL BOOKER
Restful Booker is a website created by Mark Winterham intended to serve as a sandbox for API testing. It is referenced many times in his book Testing Web APIs which details a number of approaches to not only testing APIs but other software testing techniques aswell. Winterham’s Restful Booker project is split into 2 different parts, the API endpoint part and the front end demo part. While I have previously gone through the API testing section in a separate video, in this session, I’ll be specifically going over the front end demo for creating unit tests with Selenium.
VISITING THE WEBSITE
Upon visiting Restful Booker for the first time, users will be greeted with a welcome banner at the top of the page. This banner provides links for the GIthub repository, the CirceCl page and the admin portal. Since it’s the first thing visitors see, I’ll write a test to check that it appears at the top of the page.

The Restful Booker demo platform is a sandbox created by Mark Winterham for front-end and API Testing
TEST 1 - WELCOME BANNER
The “Welcome to restful booker” text is wrapped in a h1 tag, so I’ll grab that element first. Then, I’ll write an assertion that checks that the text has the introduction message. Since it precedes all of the other introductory text, I can assume that the other text is present since it’s all in the same container.
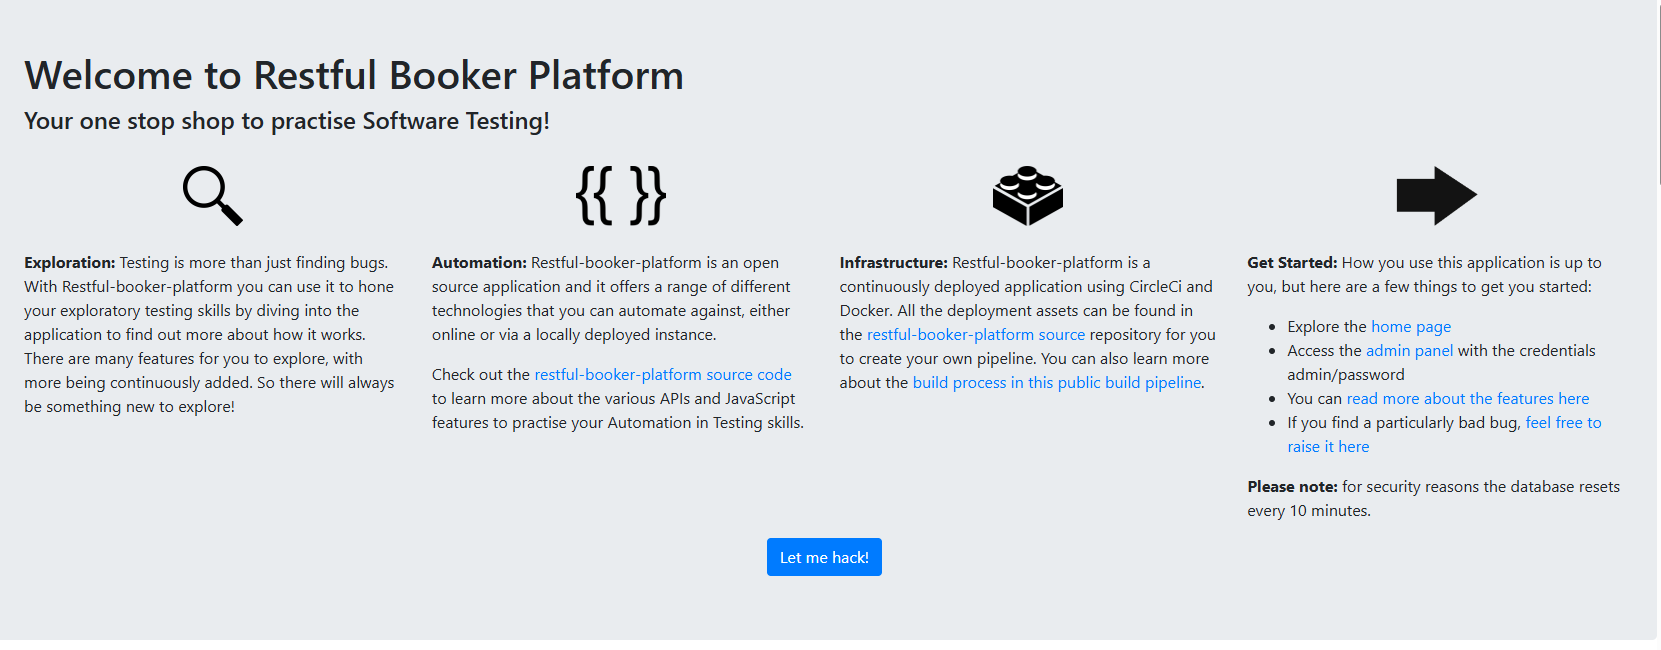
The welcome banner for first time vistors

Verify that the welcome banner displays
TEST 2 - HOMEPAGE LOGO
Next, I’ll run a test to check if the image I see at the top of the page is the correct image of the bed and breakfast logo. While there is potential for the image to change in the future, I can decrease the likelihood of any regression by checking that the source image contains the word “logo”. That way, I can at least check if the name of the file is a logo even if owners want to update the size or visual appearance of the logo.
Verify the image on the homepage is the business logo
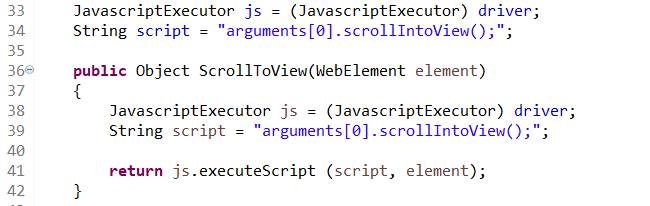
TEST 3 - ROOM DESCRIPTION IMAGE
Scrolling down the page, I can see some images that accompany each room description. At the moment it’s only one image, but I can still run a test to check that it properly displays on the page. I’ll start by performing an explicit wait for the hotel image to load in completely before I begin anything else. Then, I’ll check the attribute of the element to make sure that it is displaying an image of the room. Realistically, this test would need to include some manual testing, that is, I’d have to check the image to verify that it’s correct. I’ll debug the name of the image file so I can verify within the console later.
By default the website only displays one room, so I only need to check for one image
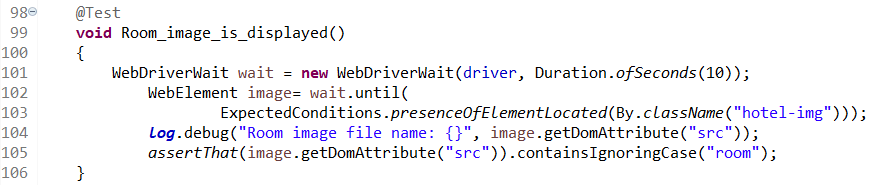
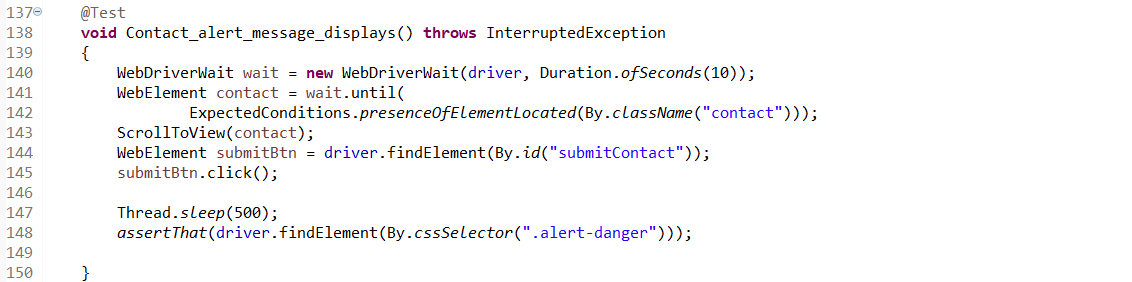
TEST 4 - ALERT MESSAGE DISPLAYS
One common feature of a website is the contact page where a user can report any issues or ask any questions that they might have. In the case that there is any missing information or error when the user clicks submit, an error modal will display on the page. Since I’m only testing the behaviour of the feature, I can test this by clicking on the submit button without entering any fields. First, I’ll scroll down to the contact section of the webpage so that it is in view. To help me with this, I’ll create a helper method ScrollToView() to get me to the WebElement I want to see.
Creating a helper method for scrolling the webpage so we don't have to call the Javascript Executor everytime.
After finding the contact page and scrolling down to it, I’ll find the submit button and use a .click() method to trigger the alert message. Assuming everything is working correctly, I assert that the alert message has appeared somewhere on the page.
Creating a helper method for scrolling the webpage so I don't have to call the Javascript Executor everytime.
TEST 5 - BOOKING SUBMISSION
One of the more complex unit tests to run is a test to make sure the booking system works as intended on the front end. I’ll break down room booking into two parts: the calendar and the input fields.
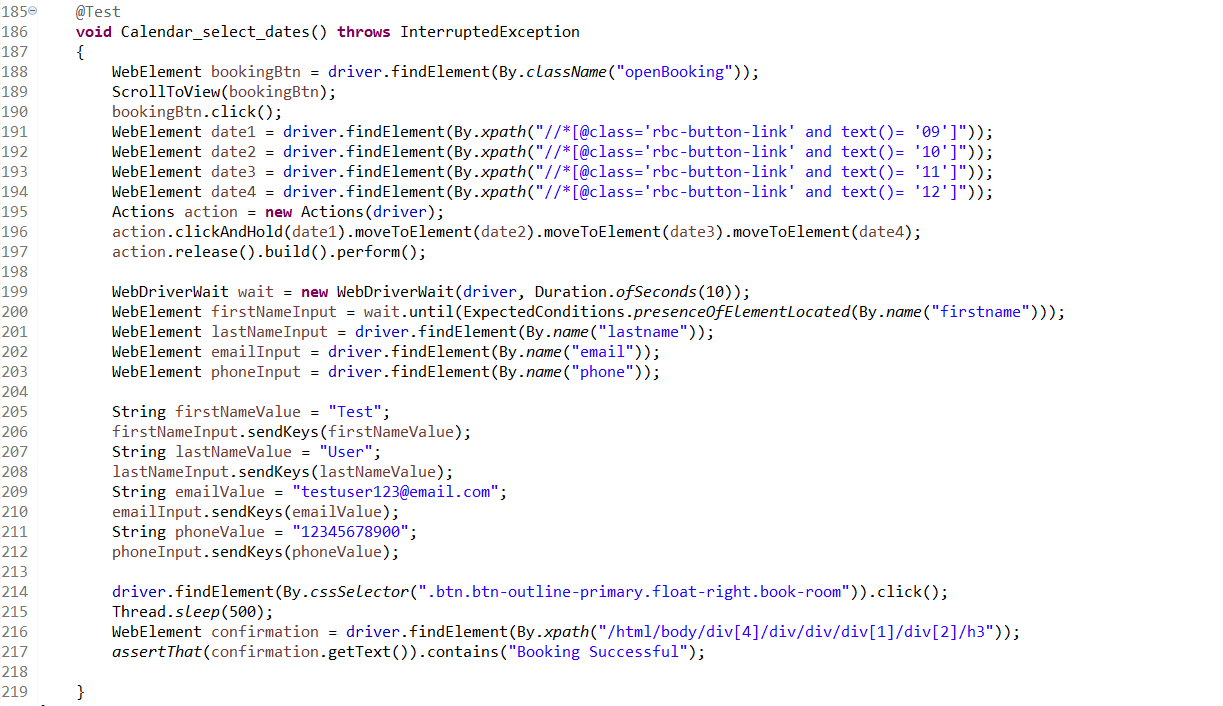
The first part of the calendar_select_dates() method will select the dates 09-12 on whatever month it is on the calendar. I want to grab the 4 date elements so using the Actions API I can use Mouse actions to select the dates I want to book. The specific method I want to use is clickAndHold which begins on my check-in date, and releases on my intended check-out date.
The second part of the Calendar_select_dates() method finds the web elements for entering in my booking information like first name, last name, email and phone number. After the input fields are filled and the check-in and check-out dates are selected, I can click the Book button and assert that the “Booking Successful!” message has appeared as expected. If it has, then the test has passed.
A sucessful booking requires entering the all fields and select a stay period